With the SERP changing into more of a Google shopping environment for most product related searches, optimizing your feeds for organic product listings is becoming a necessity.
And with it being quite new, jumping ahead of the pack and setting it up can be a move that will be of great value to your online shop.
But how do you do it? With our feed optimization tool, you will get your product feed optimized for Googles organic product listings and get the tools to monitor it.
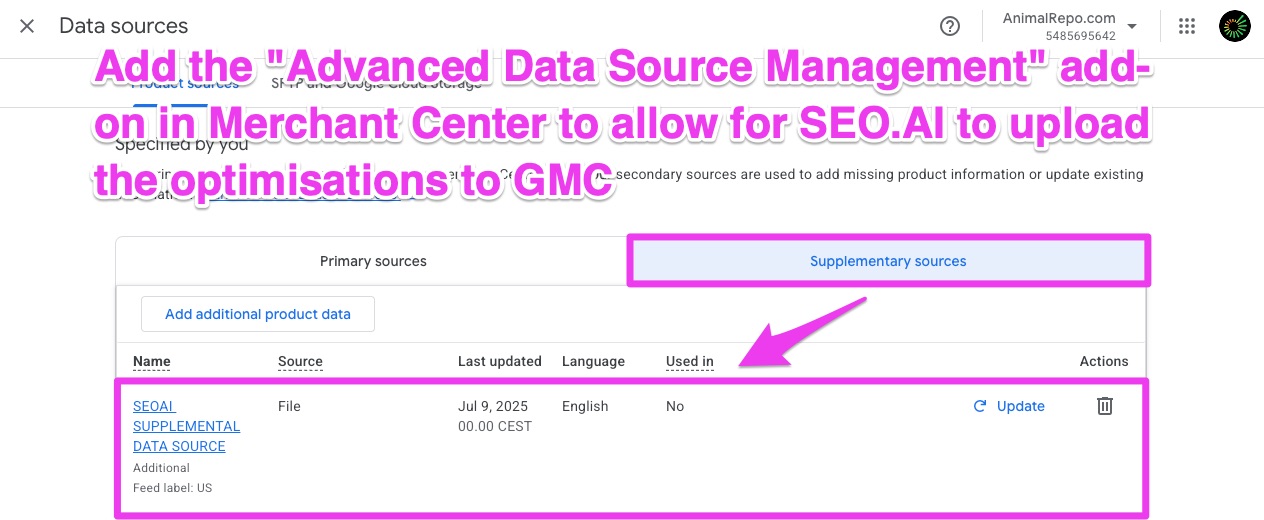
Before we get into SEO.AI, hop into Google Merchant Center first and make that you have the "Advanced Data Source Management" add-on added. It can be found by clicking the settings "gear" icon -> "Add-ons" -> Click on "Add" for Advanced Data Source Management.
How to Set Up Feed Optimization
Whenever you access the feed optimization tool within SEO.AI, you are going to be presented with 3 initial steps to get started, here is a quick walkthrough of how to get through those steps:
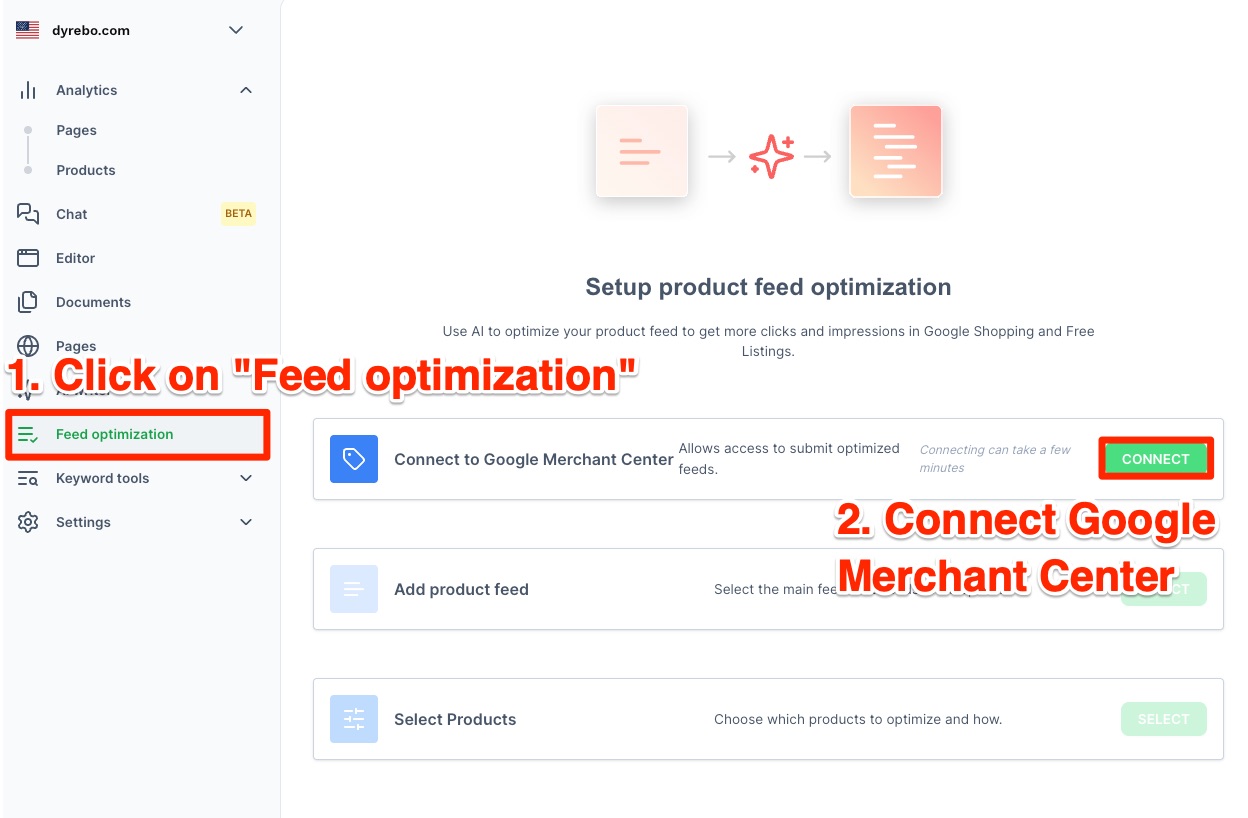
1. Connect Google Merchant Center
The first step is to connect your Google Merchant Center account to SEO.AI, which is necessary for the platform to get access to your product feed.
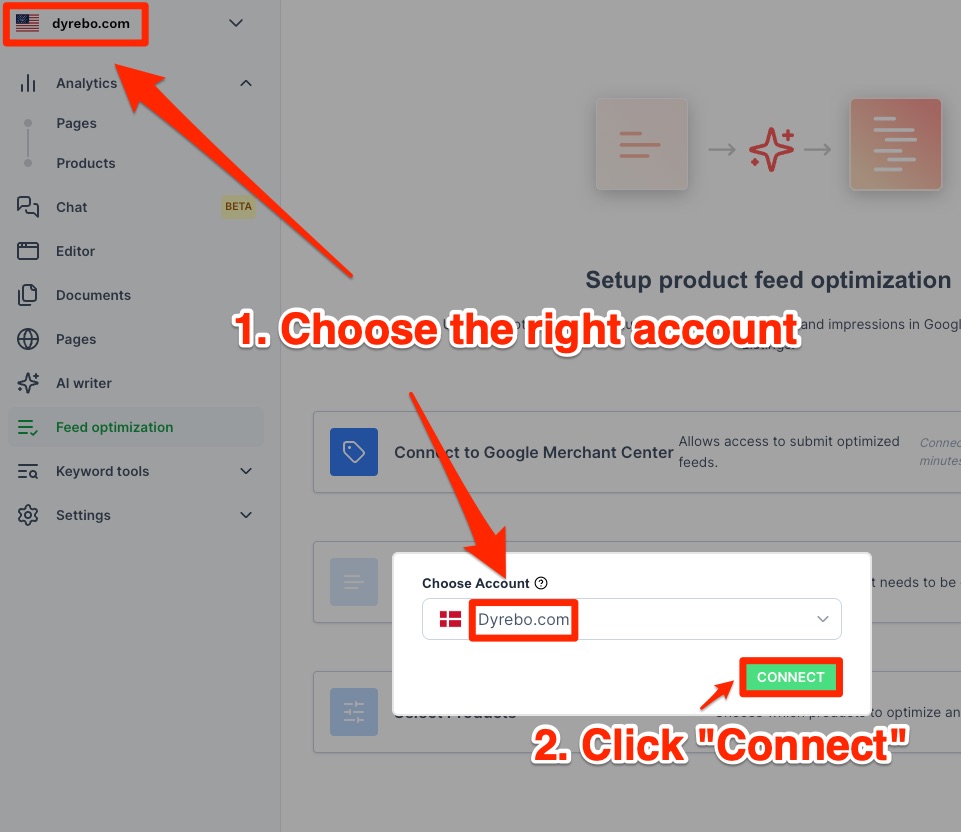
2. Choose the Right Account
This might not be necessary to mention, but is a mistake we see quite often. Make sure to connect the Merchant Center account that corresponds to the domain of the project that you are currently on.
3. Add Your Main Product Feed
Now simply add your main product feed, by choosing it from the drop-down menu and click on "choose"

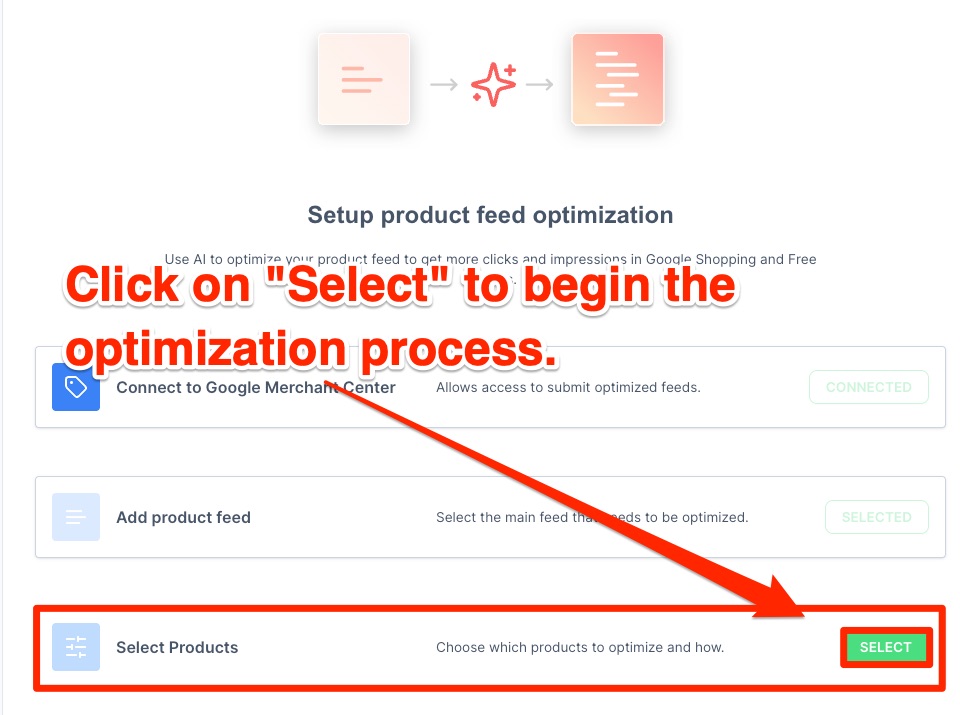
After that you are ready to begin the final set up process and create your first optimization group, click on "select" to continue.
Create Your First Product Optimization Group
We are technically still in the setup process, but if you choose to leave the setup screen now you will see a different screen.
I do however highly recommend that you go through with creating your first optimization group while you are in the setup proces.
4. Pick Which Products You Want in the Group
Usually when setting up the first product optimization group, I recommend to simply leave everything blank and move on to the next window. This is due to the fact that it is a good idea to create a group on your entire product feed first, before beginning to optimize on smaller groups.
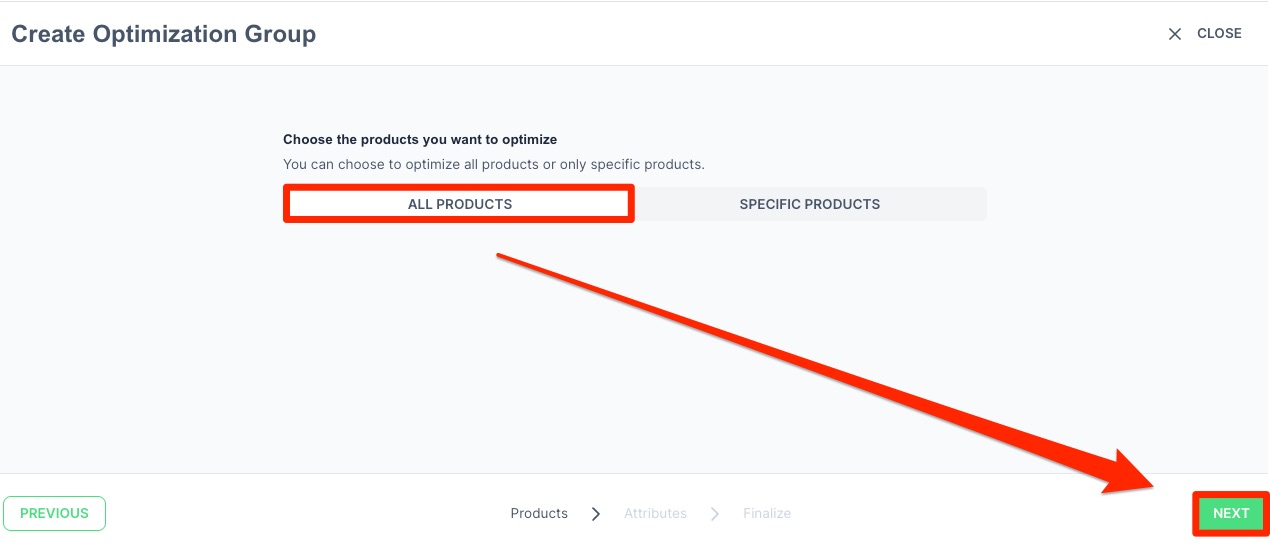
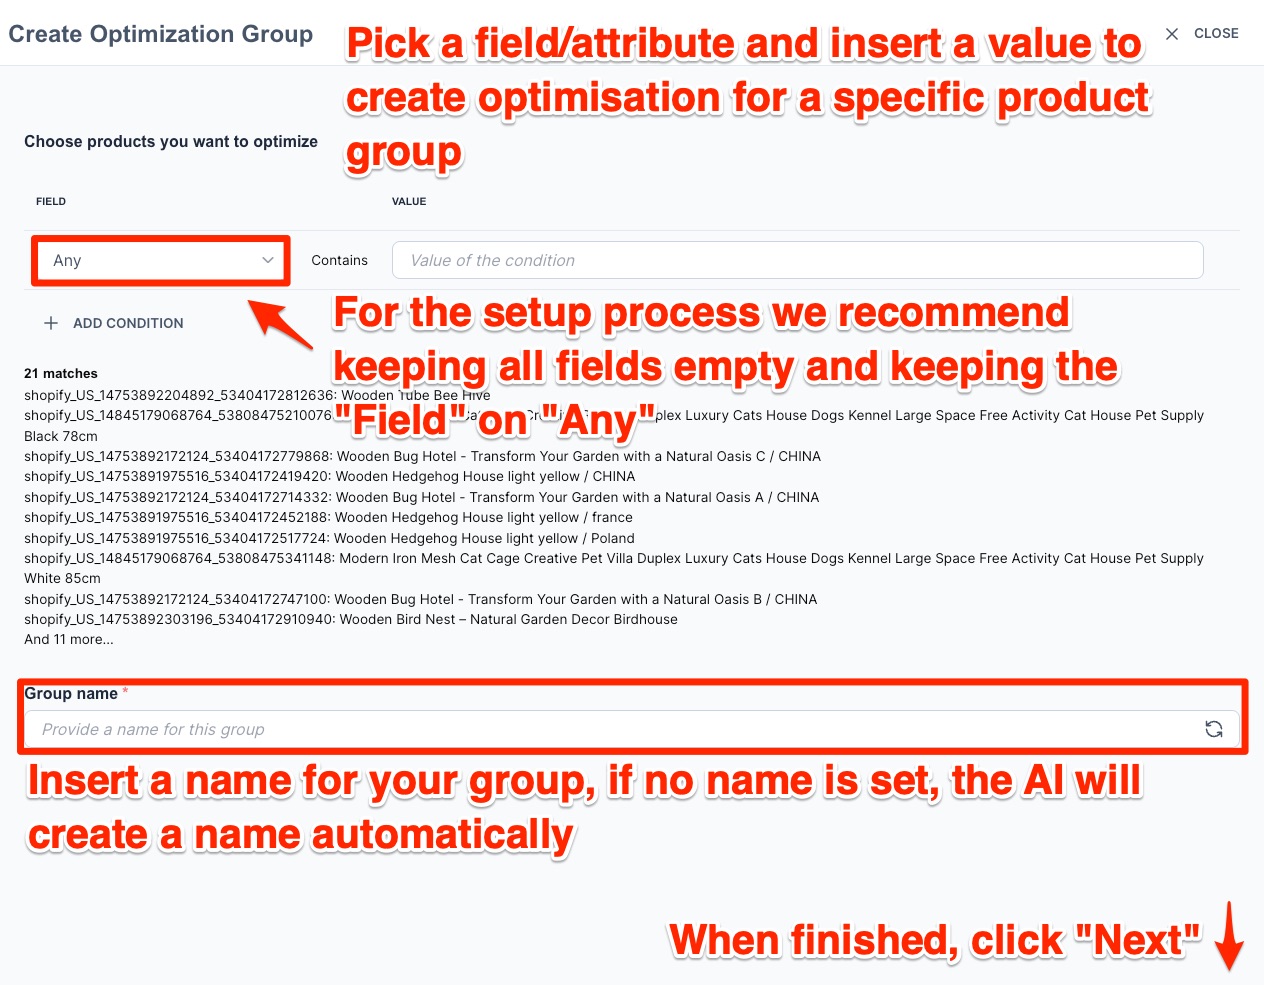
But if you have a specific group in mind, you can pick from different conditions and set values to get the specific group that you want.
Lastly before moving on, you can either choose to give the group a name, or leave it blank, which causes the AI to create a fitting group name for you.
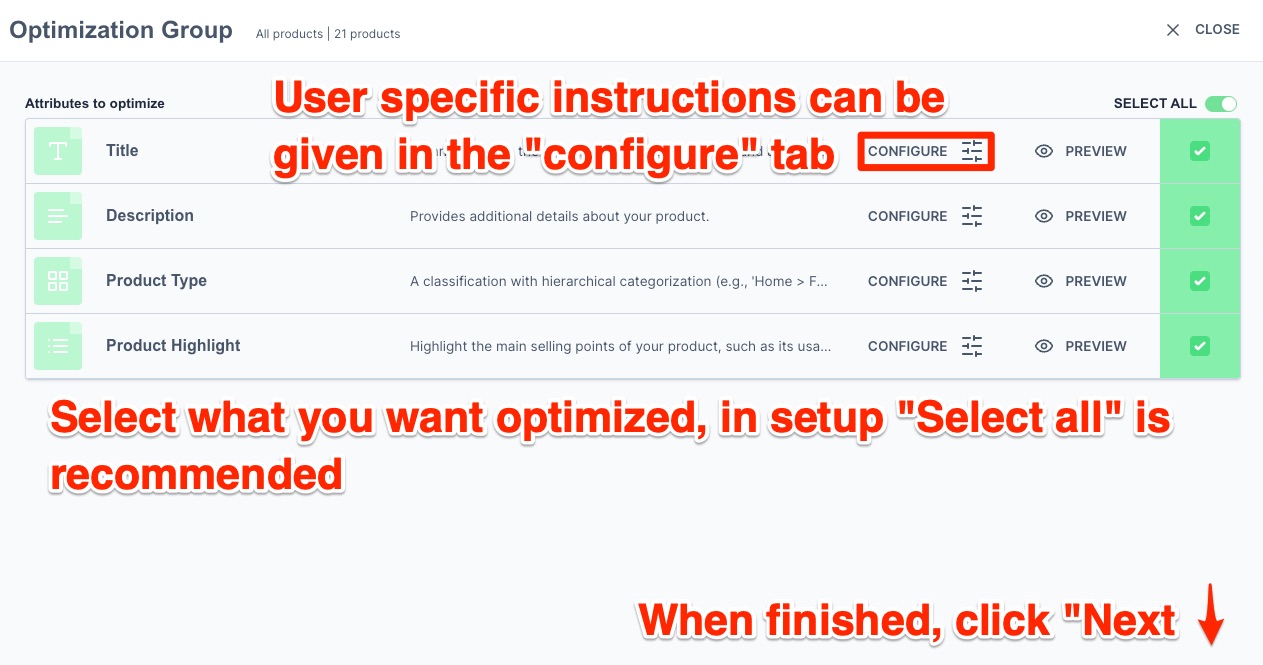
5. Configuration of Optimization Groups
For a first time user, it is again recommended to do nothing when setting up the configuration of your first product optimization group.
If it is not your first time and you are going back to optimize a new product group or are revising an existing, you can give the AI specific instructions after clicking "configure" and see an example of what it is going to look like by clicking on "preview".
Optimizations of products that have already been optimized will be overwritten. This means that if you already have optimized the title for "X" in another group, but choose to do it again, then the new title for "X" will be applied instead.
If you choose to deselect other attributes, the attributes you deselected will keep the old optimizations.
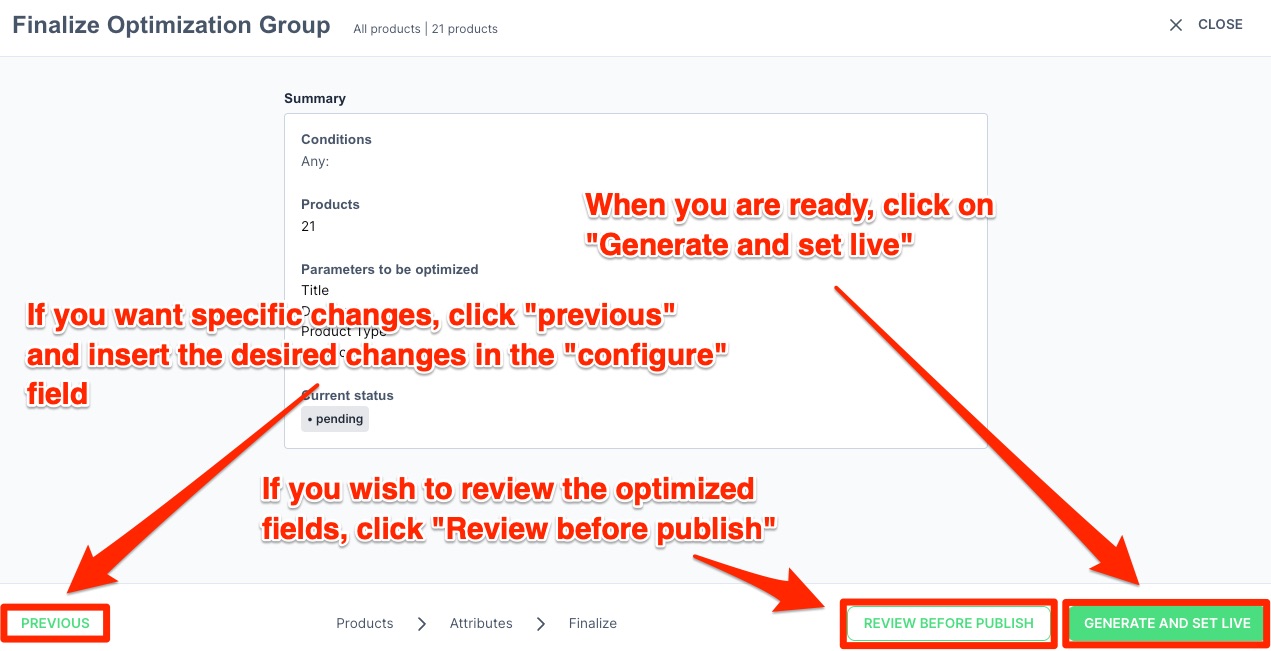
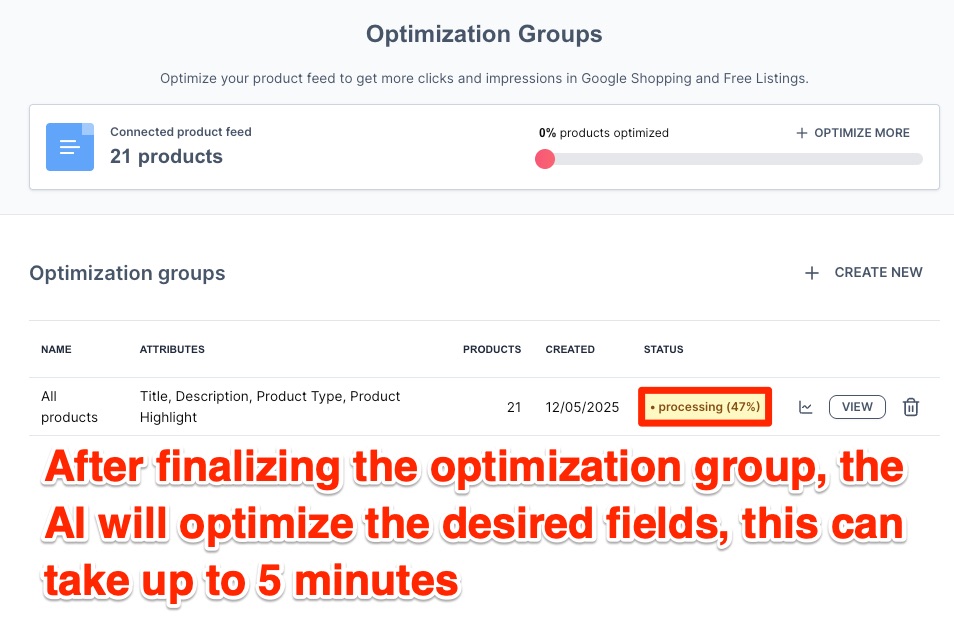
6. Finalize Optimization Group
The final step for the set up is finalizing your product group, I usually just check if everything is good here before I move on by clicking on "generate and set live".
Instead of spending too much time reviewing, I will then create a new product feed after generating this and create a new product group targetting products with a specific attribute that I want to change.
Now your first product optimization group is set up, and all we need now is to wait for the generation and deployment.
Your product feed is now optimized and you can leave the feed optimization tool. If you are a more advanced user, you can use the monitoring tools and review the feed for more manual optimizations afterward.
Want to try the #1 AI Toolkit for SEO teams?
Our AI SEO assistants helps write and optimize everything - from descriptions and articles to product feeds - so they appeal to both customers and search engine algorithms. Try it now with a free trial→