Adding products to Google Shopping increases visibility and helps customers find your items. Many buyers search on Google first, so it's crucial to have your products listed there.
Imagine someone searching for “red sports shoes” or “affordable headphones.” Your listing can stand out with proper planning. This guide covers preparing product information, creating a data feed, and ensuring your items appear on Google Shopping.
The process is straightforward: follow structured steps to get your items live. Ensure you have the right data in place and fine-tune product details as needed. While methods vary, the core principles are consistent.
We'll cover setting up an account, verifying your site, creating a feed file, and avoiding common errors.
Step 1: Create Your Merchant Account
To display products on Google Shopping, you need to have a dedicated account that holds your business and product details. If you already use Google's services, you might have a Google Account, but creating a specialized merchant account is still the first essential step.
You’ll need to provide the following:
- Basic business information (like your store name)
- A valid website where your products are sold
- Contact details
When filling out your store name, keep it professional and consistent with how you’re known online. If your store name differs from the name on your website, it might cause customer confusion. Also, make sure the chosen URL is correct. A small typo could delay the verification process.Some people wonder if you can just slip by with minimal details, but clarity is crucial. Google reviews each application to ensure it meets their guidelines. Providing the most accurate business information here can save you from rejections or warnings down the line.
Step 2: Verify and Claim Your Website
Once your merchant account is created, you’ll need to prove that you own the website where customers will complete their purchase. This is referred to as verifying and claiming your website. Doing so allows Google to confirm that you have the right to upload product data from this domain.
Why Verification Matters
Only verified owners can add or modify product listings for a given site. That’s because Google wants to protect shoppers from inaccurate listings or fraudulent pages. Without proper verification, your items could be blocked or hidden.
Verification Methods
There are various ways to verify:
- HTML file upload: You can upload a special file provided by Google to your website’s root directory.
- HTML tag: You can insert a meta tag in your website’s HTML code.
- Google Analytics or Tag Manager: If you already have them installed, you can verify through those tools.
In many cases, the meta tag option is the easiest. You copy and paste the line of code into your site’s header. Once done, click “Verify,” and if the tag is in the correct place, you’re good to go.It’s also important to “claim” your website after it’s verified. This step is often overlooked. Claiming ensures that no other user tries to represent your site.
Step 3: Prepare Your Product Data
You can’t list a product without providing details. Properly setting up your product data is key, as it helps Google know what items you sell and how to display them. Think of it like filling out a digital catalog: each item has attributes such as name, price, and description.
Below is a short table with common attributes you might need:
Each of these attributes serves a purpose. The ID is for your own tracking. The Title and Description provide clarity for shoppers. Price and Availability inform them if the product suits their budget and if it’s immediately purchasable.
You may also need to include categories, such as “Sports & Outdoors,” or product variants (like size or color). If you have an apparel item in multiple colors, you can include a variant attribute that indicates each color in your feed.
Step 4: Choose Your Feed Method
After organizing your product data, you’ll need to get that data into a format that Google’s platform can read. This is known as a product data feed. You can provide this feed manually or have a system automatically update it.

Common Feed Methods
- Manual Upload: If you have fewer products, you can create a spreadsheet, save it as a CSV or TSV file, and upload it.
- Scheduled Fetch: You host your product file online, and the system automatically checks it at set intervals.
- Content API: Offers more advanced integration and is useful for large or frequently changing product catalogs.
Which method you pick depends on your technical comfort and the size of your inventory. Small shops with stable inventories might prefer the simpler approach of uploading a single spreadsheet. Larger shops typically rely on automated processes so they can frequently update price or availability.
Manual Feeds vs. Automatic Feeds
A manual feed requires you to remember when to upload changes. If you forget, customers could see outdated pricing. Automated feeds, on the other hand, reduce these errors since the system retrieves updates on schedule. But setting them up can be slightly more involved, requiring knowledge of hosting or APIs.
Step 5: Provide Accurate and Detailed Descriptions
In a single sentence: Don’t underestimate the power of good descriptions.
Google’s platform heavily relies on the text you provide. The more relevant your keywords and information, the better your listings can match what shoppers type in. A bare-bones description might not draw much attention. Conversely, a thorough description that sounds natural can help your products rank higher and attract the right audience.
When writing product descriptions:
- Focus on key features (material, size, color, special usage).
- Keep it readable. Overstuffing with keywords can backfire.
- Double-check for grammar errors.
- Use consistent phrasing that reflects your brand’s style.
Including product specifications (like dimension, weight, or battery life) also adds credibility. Shoppers want to see exactly what they’re getting. If your item is specialized—like camera equipment or craft supplies—be extra specific, so potential buyers know it meets their needs.
Step 6: Optimize Your Images
Online listings rely heavily on visuals, so an attractive, high-quality image can determine whether a shopper clicks on your product. The platform typically requires clear images on a plain, white background, but it’s wise to check up-to-date policies because they do change occasionally.
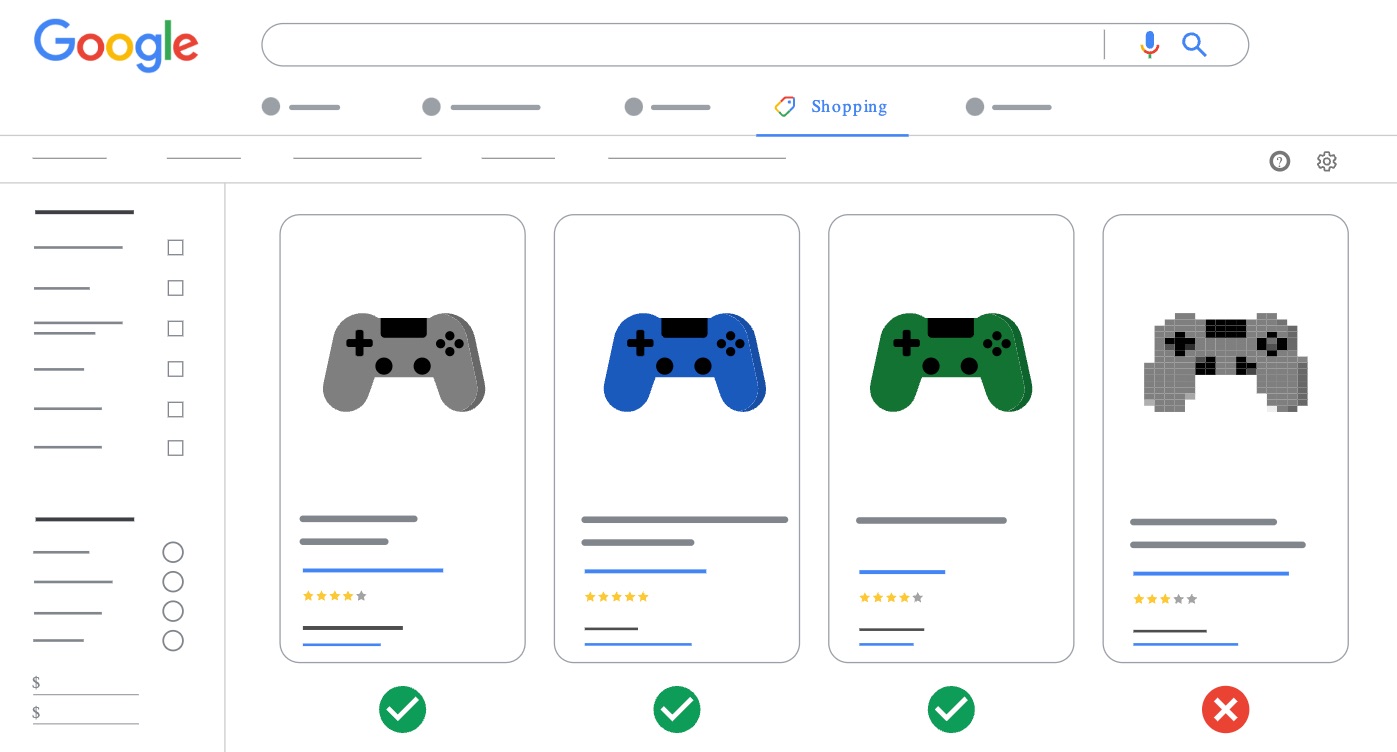
Image Guidelines
- Use High Resolution: Grainy or low-quality images put people off.
- Avoid Watermarks or Text Overlays: This can lead to disapproval.
- Highlight the Product: Make sure the item is the main focus.
- Consistent Style: If you can, use a uniform look so your listings appear more professional.
If your product has multiple angles or color variants, include additional views. This helps shoppers get a better sense of what they’re about to buy.
Step 7: Configure Shipping and Tax Settings
While some businesses ship only to local regions, others might have broader plans. Generally, you’ll need to set up shipping and tax details at the account level or feed level. This step ensures that when a user sees your product listing, the correct shipping cost (and taxes, if applicable) is displayed.

Setting shipping and tax rates can be done in various ways:
- Flat Shipping Rate: A single rate for all orders, or by weight and distance.
- Carrier Calculated Rates: Pull real-time shipping prices from your chosen carrier.
- Tax Rates by Region: If you must collect sales tax in specific areas.
It’s also good to double-check that your shipping policy is standard or fair. If your shipping fees are too high, potential customers may leave and look for cheaper options.
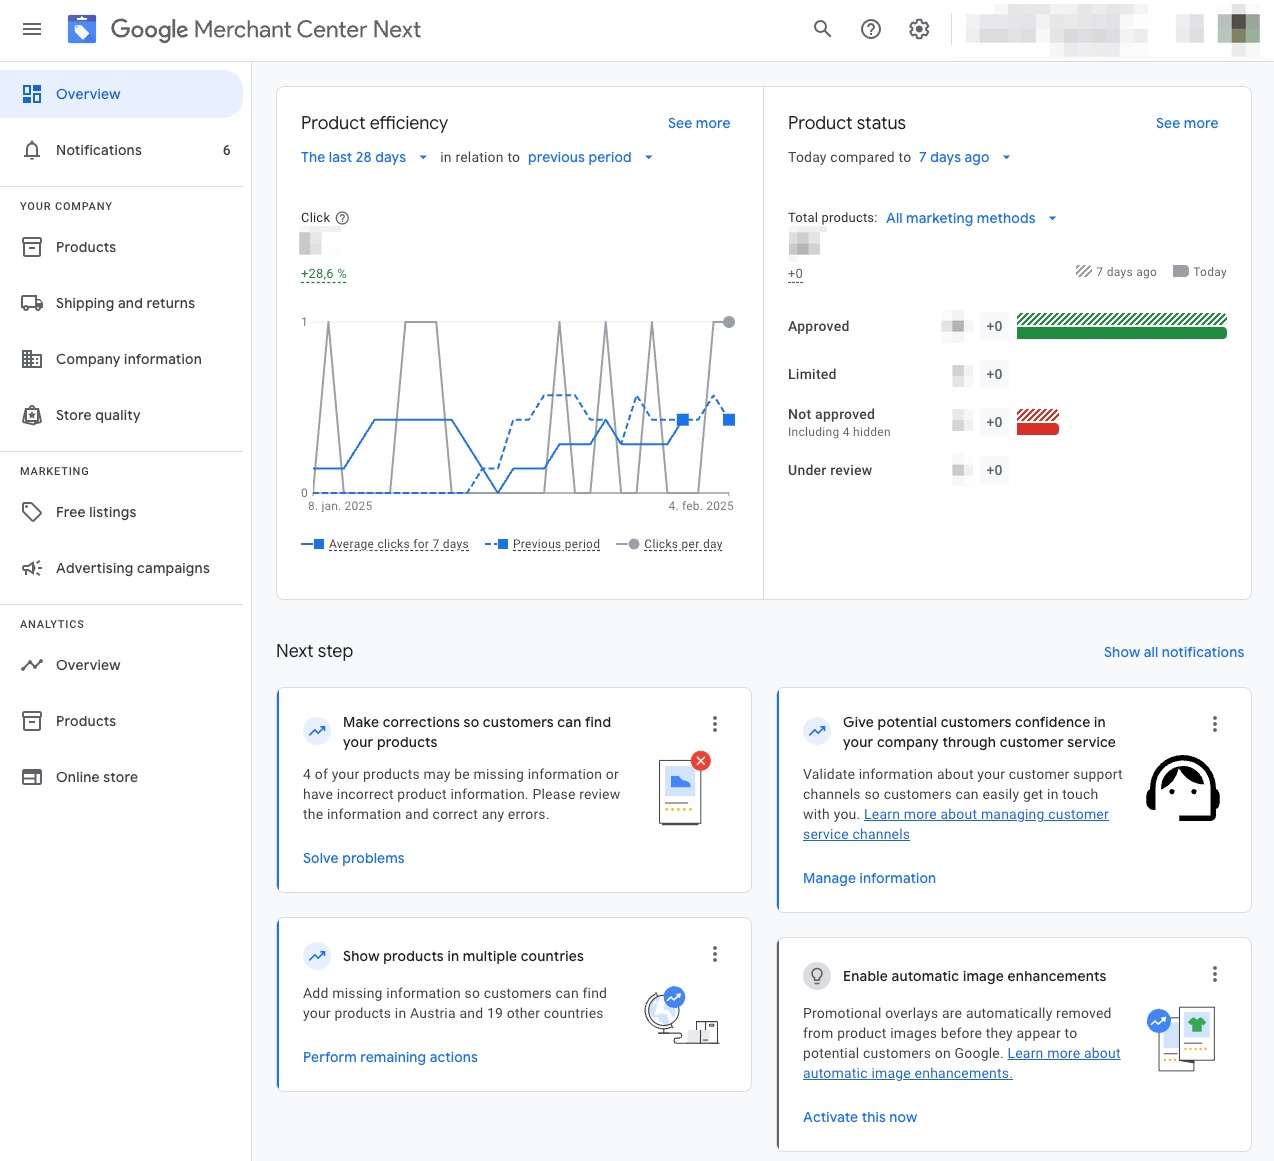
Step 8: Submit and Maintain Your Feed
Once everything is in order, it’s time to get your product data live. You can manually upload your file or schedule a routine fetch. For an automated approach, set a daily or weekly fetch (depending on how often your inventory changes).
What Happens After Submission?
• The platform processes your file and checks for errors or missing attributes.
• You receive notifications if something fails or if you need to fix any issues.
• If everything looks good, your products start showing up on the shopping platform.
Some people make the mistake of thinking it’s a one-and-done situation. In truth, feed maintenance is an ongoing process. Prices, stock status, or descriptions can change. Keep your data up-to-date so you don’t lose potential sales or misinform customers.

Step 9: Review Common Errors
It’s not unusual to encounter minor issues. Don’t be alarmed if you see warnings like “Incorrect image link” or “Missing required attribute.” These errors are fairly standard, especially on your initial setup.
Typical Errors You Might See
- Disapproved Images: Perhaps the background isn’t acceptable, or there's a watermark.
- Mismatch in Price or Currency: The price in your feed doesn’t match what’s on your website.
- Missing GTIN or Brand Info: Many products require certain identifying codes.
- Policy Violations: Items that violate content policies might get disapproved.
When these errors appear, you can fix them and resubmit your feed. Pay attention to notifications or logs, as they guide you to which items need corrections.
Fine-Tuning Your Product Attributes
For more visibility, dig into extra fields. While basic attributes are mandatory, there are additional data fields you can use, like “sale price” or “multipack.” If you sell items that come in sets or bulk, including “multipack” can highlight that difference.
Some businesses go further by adding custom labels, letting them group products for specialized campaigns or categories. If you want to track how a certain group performs—like “summer collection” or “holiday sale”—custom labels can be very handy.
Don’t Forget About Product Categories
Categories help categorize your items correctly. For instance, a computer accessory might need to be labeled in “Electronics > Computers > Accessories.” Proper categorization not only helps the system place your items accurately in search results, but also ensures your feed follows guidelines.
Managing Promotions and Discounts
If you ever run a special promotion, you can make that clear in your data feed. For instance, the “sale price” attribute can show a discounted rate alongside your regular price, indicating to shoppers that they’re getting a deal. Timing is everything. If a sale ends, remember to revert the feed.
Bullet points to keep in mind:
- Update sale price attributes before the promotion starts.
- Change it back after the promotion ends.
- Ensure your website reflects the same discount or your listings might be disapproved.
This step is especially useful during big sale events, like holiday seasons when shoppers are specifically looking for deals.
Tracking Performance and Making Adjustments
Once your products are visible, you might wonder if they’re actually drawing traffic. Are they generating clicks? How do you know if the listings need improvement? Monitoring your performance is an ongoing responsibility.
- Watch for changes in impressions and clicks.
- Compare product views: sometimes certain items receive more interest.
- Check bounce rates on your site after those clicks. If many shoppers leave immediately, maybe your product titles or images need reworking.
By staying on top of these trends, you can refine your approach: adjust titles, add more images, or switch up your descriptions to address buyer questions.
Handling Larger Inventories
If you have a big catalog, managing each product individually can get overwhelming. That’s where automation or specialized software can come in handy. You can integrate a system that communicates directly with your online store database, pulling product updates in real time.
Tips for Big Catalogs
- Use a platform that automatically exports your item feed in the correct format.
- Set up daily or even hourly updates if your pricing changes frequently.
- Regularly clear out any “out of stock” or discontinued items to avoid confusion.
Taking small steps to streamline your product feed can spare you from juggling thousands of products by hand.
Additional Formatting and Policy Guidelines
It’s wise to stay updated on any policy changes or new formatting requirements. The platform occasionally updates submission rules or adds new required data. Being proactive about these changes keeps your listings active and free from warnings.
For instance, certain categories—like electronics, clothing, or health products—sometimes have extra rules. If you sell items that fall under restricted or sensitive categories, you’ll need to follow special guidelines.
Putting It All Together
Making your products appear on Google’s shopping platform boils down to organization and accuracy. You create an account, verify your site, prepare your product data, choose a feed method, and keep everything updated. If any step feels tricky, you can break it down further:
- Go step by step. Set up your account and website verification first.
- Organize your data into a clean spreadsheet (or use automated systems if you have many items).
- Make sure your images are clear and your titles/descriptions are compelling without being misleading.
- Provide shipping and tax details that align with your actual store policies.
- Submit your feed, watch for errors or warnings, and correct any issues promptly.
Keeping your product details up to date boosts trust and ensures a better experience for everyone. If potential buyers see the correct price and availability every time, they're far more likely to complete the purchase.It can feel a bit tedious at first, but once you get the basics right, maintaining your feed and seeing your products show up for relevant searches can be quite rewarding. Shoppers get what they’re looking for, and you get visibility on a major platform—it's a win for both sides.
Troubleshooting Quick Checklist
- Is your store verified and claimed? If not, your products won’t appear.
- Are your product titles, descriptions, and prices the same on your site? Mismatches cause problems.
- Did you add key attributes like condition and availability? Missing required fields leads to disapprovals.
- Are your images clear and policy-compliant? Visual content is crucial.
Use this checklist whenever something seems off. Often, the solution is a simple update in your feed or a fix on your website.
Frequently Asked Questions About Google Shop
Adding your products to Google Shopping enhances visibility and connects potential customers with your store. Below, we answer common questions to simplify the process.
What is Google Shopping, and why should I use it?
Google Shopping is a platform where merchants list products for users to discover via Google search. It improves your reach and connects you with buyers actively looking for items you sell.
How do I get started with Google Shopping?
First, create a Merchant Center account, verify and claim your website, and prepare a product data feed with detailed information like titles, descriptions, and prices. Submit the feed to make your products visible.
What are the key steps to verifying my website?
You can verify ownership by uploading an HTML file, adding a meta tag to your site, or using tools like Google Analytics. Once verified, claim the website to prevent others from managing listings for your domain.
What product information is required?
At a minimum, you need attributes like product ID, title, description, price, availability, and an image link. Depending on the category, you may also need details like brand, GTIN, or item condition.
How do I submit my product data to Google?
Submit your data via manual upload (spreadsheet in CSV/TSV format), scheduled fetch (hosted file), or Content API (automated updates). Choose the method based on your inventory size and technical setup.
Do I need to optimize product descriptions and images?
Yes, well-written descriptions and high-quality, policy-compliant images improve your product's visibility and appeal. Descriptions should be detailed yet concise, while images must be clear, feature no watermarks, and focus on the product.
What shipping and tax details are necessary?
Your listings must include accurate shipping costs and applicable tax rates to ensure transparency for buyers. Options include flat rates, carrier-calculated fees, or region-specific taxes.
How do I handle errors with my product listings?
Common issues include mismatched prices, missing attributes, or disapproved images. Fix these errors by updating your feed or site details, then re-submit for review.
Is Google Shopping suitable for large catalogs?
Yes, large-scale businesses can rely on automated systems like Content API or scheduled updates to efficiently manage inventory. Regularly update product availability and pricing to maintain accuracy.
How can I track and improve my product performance?
Monitor metrics such as impressions, clicks, and conversions in your Merchant Center dashboard. Adjust titles, descriptions, or images if certain listings underperform.
What should I keep in mind for long-term success?
Consistency is vital. Keep your feed, website, and policies aligned, and update your data regularly. Staying compliant with Google’s guidelines ensures uninterrupted visibility for your products.
Google Shopping simplifies the buying process for customers while increasing exposure for your store. With accurate data, compelling visuals, and ongoing maintenance, you can boost your online presence and reach more buyers!"
Want to try the #1 AI Toolkit for SEO teams?
Our AI SEO assistants helps write and optimize everything - from descriptions and articles to product feeds - so they appeal to both customers and search engine algorithms. Try it now with a free trial→